Wireless Networking for RV
Living full time in an RV brings many challenges. The toughest is how to connect to the internet. Options exist and I am not going to go into those in much details as there are several links to describe this such as the excellent Mobile Internet Options article on Technomads. The obvious solutions like phones, air cards, and hot spots provide a method to get the information highway. However, bandwidth and cost go together so they do not necessarily work, or should be reserved for times where there are no other options.
Wi-Fi is the holy grail of bandwidth and freedom – if you don’t have to pay for it. So, I went seeking solutions and came
TP Link
across this series of articles on Dick Eastman’s RV site:
How to Build a Long-Range Wi-Fi System – Part #1
How to Build a Long-Range Wi-Fi System – Part #2
How to Build a Long-Range Wi-Fi System – Part #3
Follow-up: How to Build a Long-Range Wi-Fi System: Configuring the Outdoor Access Point
This can be done! However, it takes a little know how, research, and simplification.
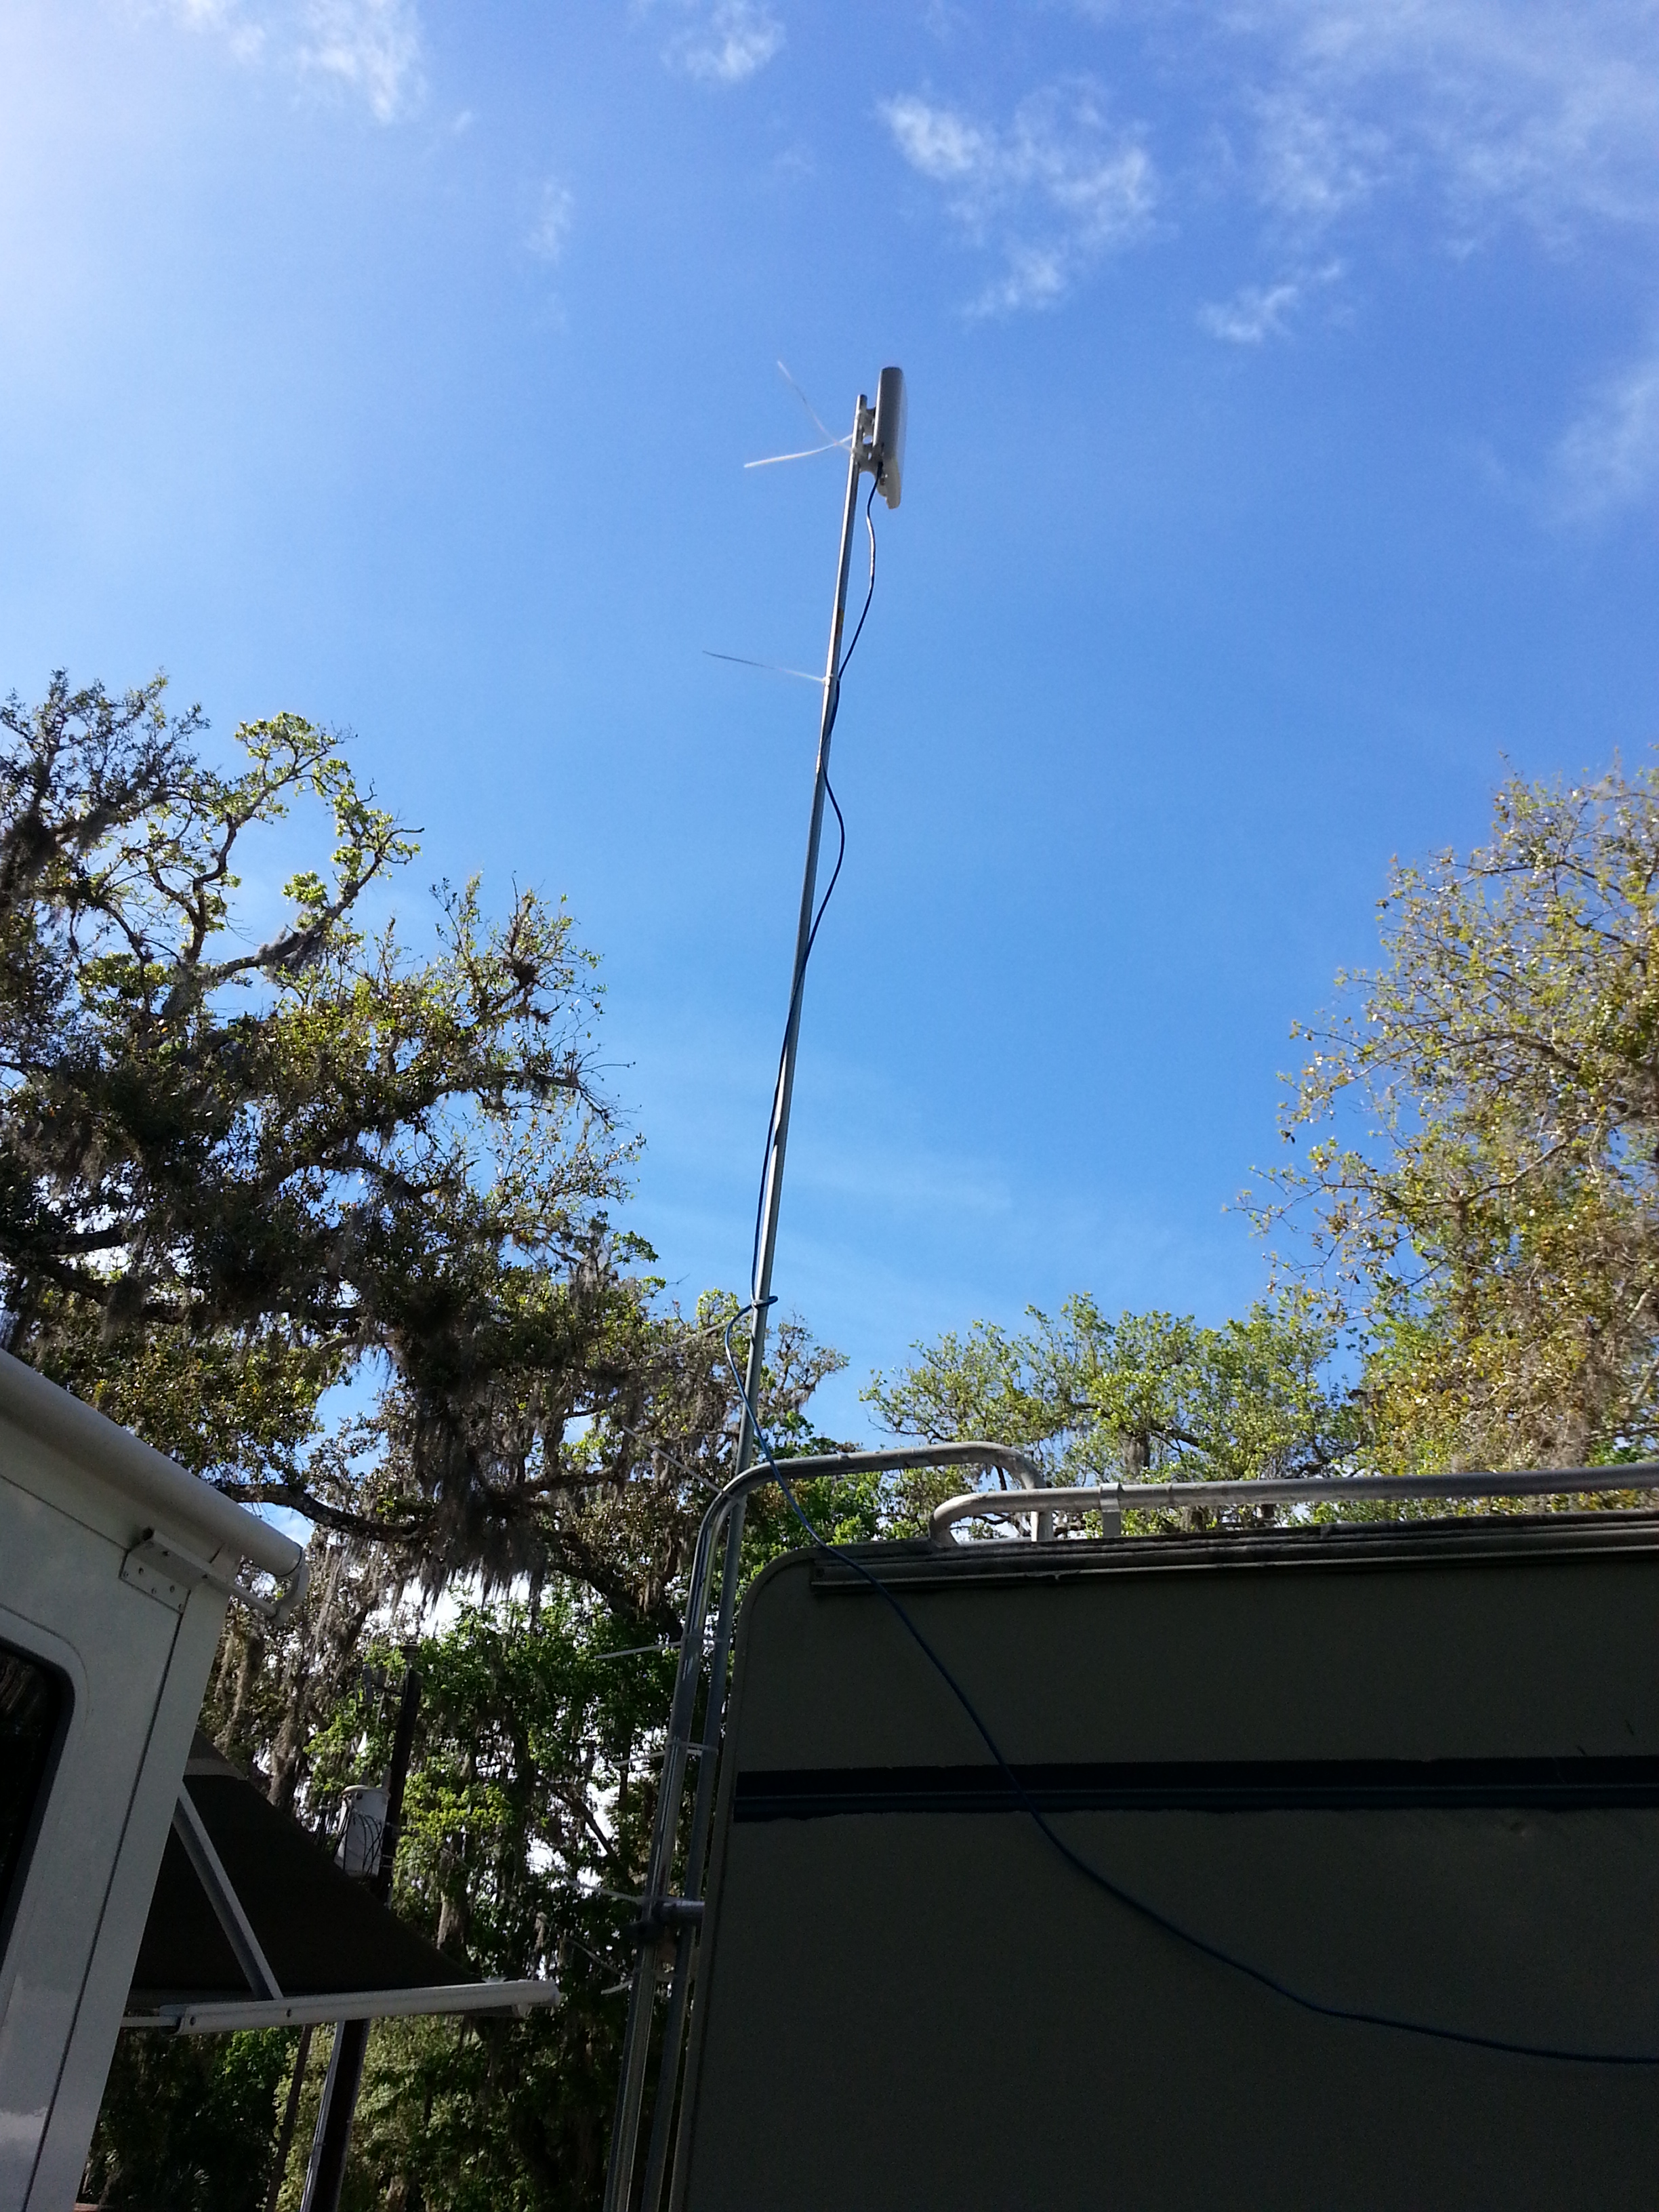
TP Link mounted at rear of RV
Mounting my access point was easy. I bought the access point from Amazon as described in the column and mounted it on my RV using a 10 foot piece of conduit with tie straps. Not the best for moving around, but it did accomplish the immediate need.
the way to think through how this will work is as follows:
[RV Park Internet] -> [TP Link on a mast (primary router)] -> [Your wireless acccess point (slave)]
You must know the network SSID for the open network you are connecting to. I use my phone or computer to find this
Next – for first time configuration of the TP Link, plug in a cable as described in the prior articles. The things you MUST KNOW:
- Make sure you set the TP Link to “AP Client Mode”
- Change the IP address of the TP Link to 192.168.1.1 from 192.168.1.254
- this setting is under “LAN”, not “WAN”
- Under “WAN” I made no changes
- Doing a survey will find the best connection
- You don’t have to enter the SSID name because a survey will find it
- You can move the antenna to the 12, 3, 6, 9 O’Clock positions and survey again to find better signals
- Each time you use the TP Link you will need to correctly enter the SSID of the wireless network to which you are connecting
- IMPORTANT!!
- Enable DHCP
- Set the address range to start at 192.168.1.3
- This will be one above the range for the slave router
Now we must setup the slave. Disconnect the TP Link after making all changes, rebooting, and verifying you can connect to the internet with your laptop connected. After disconnecting, connect your wireless access point secondary (slave) router with a cable to your
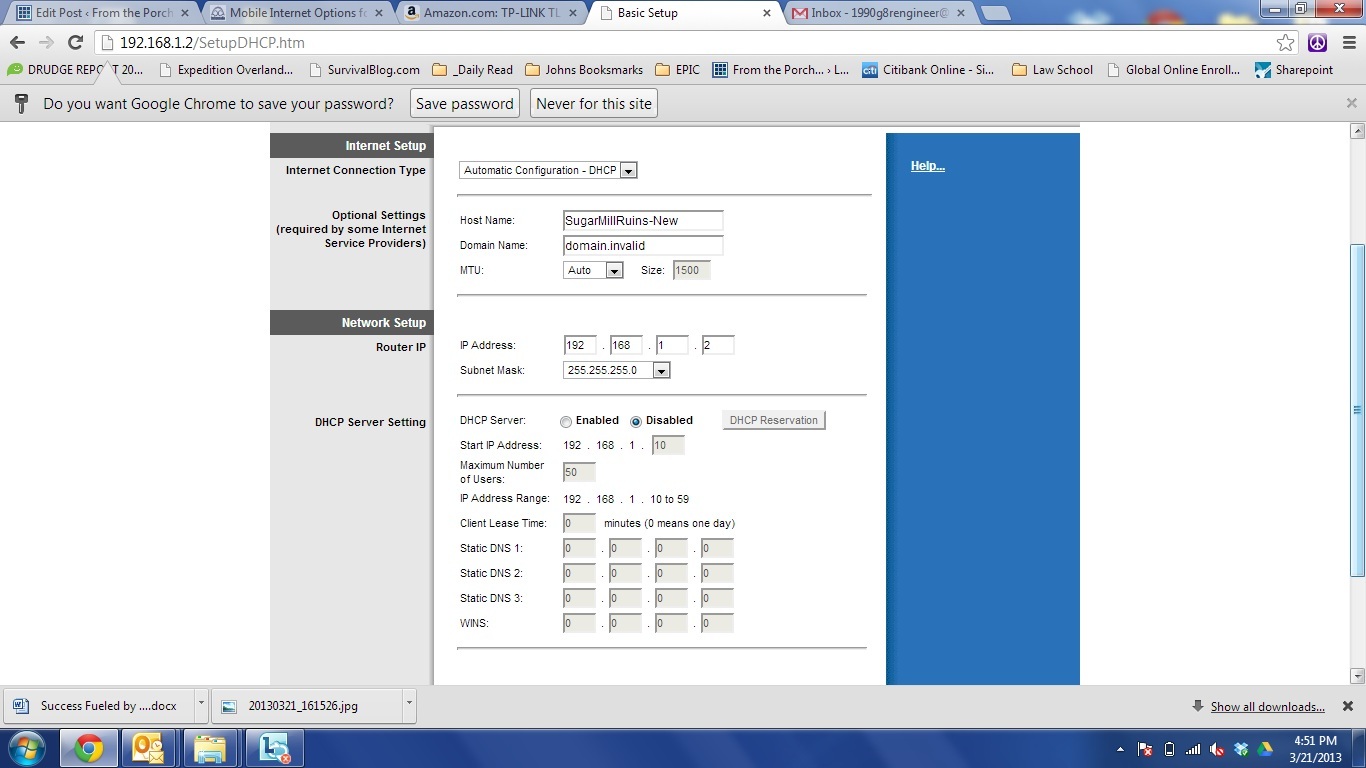
Lynksys Setup Screen
computer. I will assume you have correctly configured wireless access and passwords. Type the IP address and log in. Make sure to make the following changes:
- Under internet setup you want automatic DHCP — this is because the TP Link will ASSIGN the IP addresses
- Under network setup where you can set an IP address for the router change the value to 192.168.1.2
- Under DHCP Server Setting, select “DISABLED” this is because the TP Link will be our Router
- Save the settings
The last step is where I went awry for a while, so here we go:
- Unplug power to everything (clean start)
- Unplug the ethernet cables from the computer
- Take the LAN cable from the TP Link primary and plug it into a LAN port on the slave
- DO NOT plug it into the WAN port
- I recommend position 1 but it does not matter
- Plug an ethernet cable into position 2 of the LAN of the Slave
- Plug the ethernet cable from the slave into your computer
- Plug in the TP Link power cable
- Wait 30 seconds (let it connect)
- Plug in power to your Slave router
- Reboot your computer
When the computer comes back on everything should work.
I recommend this site for more troubleshooting help

Recent Comments